Showing posts with label costume. Show all posts

Thursday, September 27, 2012

DIY Hooded Sweater Dress

It's fall, which is my favorite time of year. It also just happens to mean a huge change in wardrobe. I got through summer wearing dresses, but it's a bit harder finishing off my pregnancy in summer dresses in fall. I really hate the idea of "maternity clothes" so anything I've made has to work for me when I'm not pregnant as well.

So here is an awesome (and really easy) tutorial for a great fall sweater dress.

 
What you'll need:
2 oversized sweatshirts
1 sweater
fabric scissors
straight pins
measuring tape
tailors chalk
sewing machine
serger (optional)
 
Start with your oversized sweater. Mine had a huge stain on the sleave, so it was lucky I didn't really need it because I had a spare sweatshirt.
 
 
Start by removing the sleeves and cutting open the side seams.
 
 
Next cut straight across the top neckline.
 
 
You should have two nice big square pieces of fabric now. Set them aside for later.
 
Next take out your sweater; mine is oversized so I had to fit it down to size. However if yours fits, simply remove the sleeves and open up the sides.
 
 
Next remove the sleeves from your sweatshirt(s) and cut them to fit the arm holes of your sweater. Open up the seams of the sweatshirt if you don't need to cut it down.
 
 
Open up your sweater and your sleeves and pin the two pieces right sides together.
Sew the sleeves into place (and I recommend you find someway to finish the edges, either with a zig-zag stitch, pinking shears or an overlock machine)
 
 
Next take the two large sweater pieces you cut previously and cut them at the sides to fit the waist of your sweater.
 
 
Pin and sew your sweater bodice to your skirt with right sides together. Again finish off the edges.
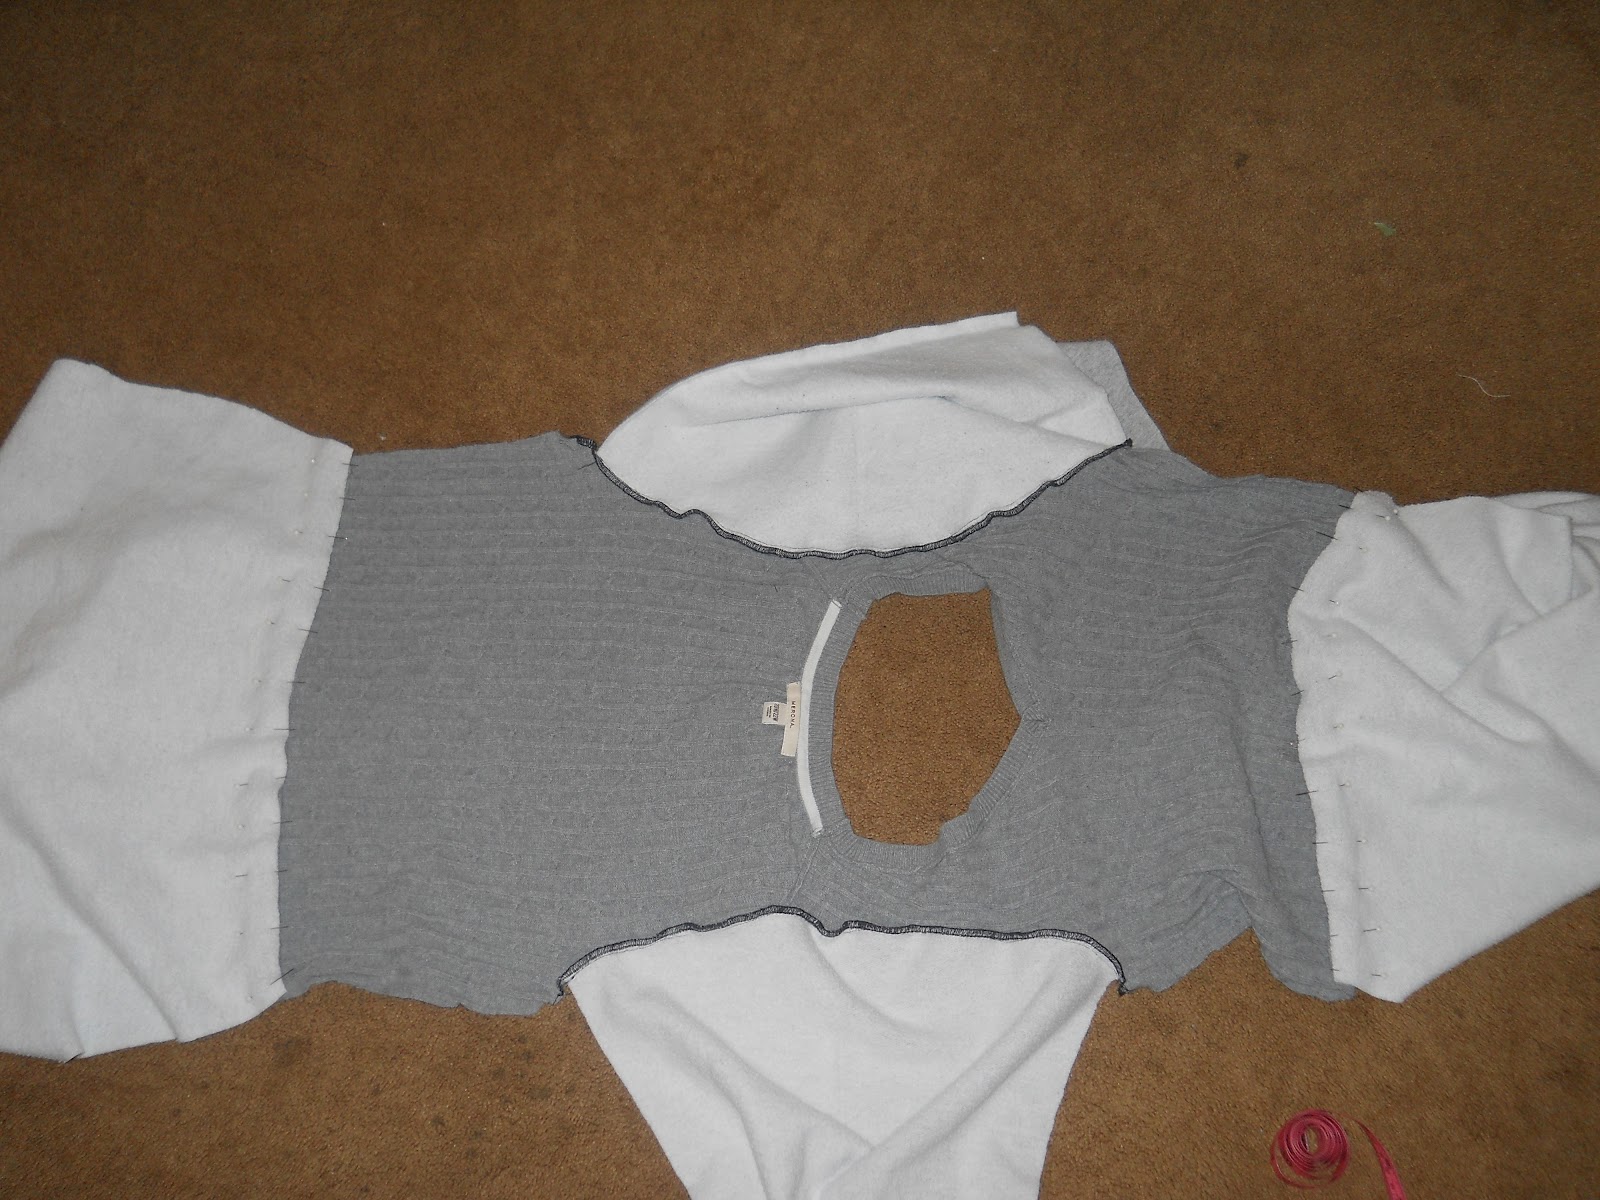
 
 
Next fold your dress over so right sides are together. Pin making sure to match up your seam lines at your waist, sleeves and hem.
Starting at the sleeves sew a continuous seam all the way down to them. Again finish off the edges. (This is my first time putting a garmet together this way and I have to admit, I like it a lot more than piecing everything together bit by bit. Plus it gives a professional finish)
 
 
Try on your garment and decide the length you want your sleeves. I decided on a quarter length sleeve. Mark and cut off your excess material.
 
 
Using some of your scrap sweater material cut two pieces that are the size of your sleeves by about 4 inches. Sew them into tubes and pin right sides together to your sleeve and sew.
 
 
Next fold your cuff over and fold to make a binding. Pin and sew. (FYI make sure to do this step using your longest stitch lenth and take your time, otherwise you'll break your needle because of the thickness of material).
 
 
At this point you can totally be done if you want and you can rock your dress.
 
 
I however, wanted to add something special to mine. So taking my extra sweatshirt I cut out a hood shape.
 
 
Pin the right sides together and sew.
 
 
I finished all the raw edges of my hood next and then pinned and sewed into place.
 
 
I had to go back and make a minor adjustment to fit my belly (i.e. raising the waist line) but after that you're finished- unless you're like me and reminded of Hermione Granger by your dress and you decide to add a prep-school patch to your uniform, I mean dress.


Sunday, October 10, 2010

Labyrinth Masquerade Mask

I love the movie Labyrinth! It is probably my all time favorite movie, I can never ever see too much of it! So it only makes sense that I was inspired by the movie while making this mask which is great for Halloween.


You'll need lots of supplies and imagination to make this. Everything from tulle, feathers, bridal decor and something that you can use to press down with so you wont burn your hands on the hot glue.


I started by covering the base of my mask which was originally all white with silver and gold glitter glue. Glitter glue usually takes 1-2 hours to dry, so I used a hair dryer to speed up the drying process.


While I was waiting for the glitter glue to dry and before I read the label at how long it takes to dry, I hot glued a ribbon on the stick of my mask. If you don't have a stick don't worry about this, but its a lot more fun if you do.


After my glitter glue was dry, I cut a piece of lace in the shape of a rectangle to cover my mask.


I turned my mask around and used my hot glue gun to glue the lace down, pulling the lace taute and using the handle to my paint brush to press the lace down so I didn't burn my fingers. When I was finished I cut off the excess lace.

I decided to leave the lace covering the eyes of the mask for a more modern twist, but you could cut small holes in the center and fold and glue the lace in back of your mask if you don't want that look.


I added a cord around the outside edge. again using my paint brush to press down so I wouldn't burn my fingers. Safety is important!


Next, I used my sewing machine to pleat a long piece of tulle and I once again hot glued that to the back of my mask using my brush.


I used the same ribbon from the handle and a piece of lace and some pearls to hange from the handle.

To do this, I tied my ribbon and lace once to the handle and hot glued in place. I then hot glued the pearls to the knot and tied another knot over it.


I also had some pearls on clear wire that I wraped around the handle and hot glue down.


Lastly I glued the little ribbon roses with pearls down to the corner of my mask.


And finito!


I think I might need to start doing video tutorials. What do you think?

Enjoy the show!

Sunday, October 3, 2010

Halloween Costume Ideas

I love love love Halloween! So I thought I'd start doing a a show and tell of different ideas to get everyone ready for the day of the dead.

I will start, with the most important thing on Halloween- your costume!


Here's some fun ideas I've run by on the web this year that I LOVE!

•Energizer bunny costume. Think Playboy Bunny with a Drum!

Pinata! Think how much fun you can have making a costume with crate paper!

Spaceball costume! The comical version of Star Wars on the cheap! Any local thrift store should have what you need.

A few other great costumes I've found that I like.

Raven


Grey Lady


Oogie Boogie

Thursday, September 9, 2010

Millinery

One of the first things I learned how to do was to make hats. Primarily Regency Bonnets. I mainly use straw as a base because, its cheap, its natural and it's moldable. I've done historical Reenactments since I was about 15 so I have a lot of hats that I've made and I will basically load you all down with pictures of hats today.

First hat is Anna. She's made with a straw base, black satin, green satin ribbon and green plume.


The next hat is Elinor, she has gold crown and a blue satin ribbon.


Emma is a white cotton bonnet.


Fanny was the most difficult hat for me to make because I was given this really big black bonnet that I literally tore apart and then re-sewed by hand the straw in the form I wanted it. So it took a lot of time and was in pieces for about a year.


I also wanted to show you that the brim is folded in the back and is not attached to the crown.


Kitty appears to be a simple hat. She used to be one of those large brimmed hats but I cut the back out of her hat to make her into a bonnet.


Lady Hamilton is one of my favorite hats. She has a black velvet crown, a black lace tie and black ostrich plume. And again the brim in the back is molded up so there is nothing holding it up.


Next is Lizzy which was probably the first bonnet I ever made. She's taken a lot of wear, expecially recently when I let my 8 year old sister wear her out. She is in sad need of repair but I will probably wait until the next time I am reenacting to do that.


Lucy is a more recent bonnet and I also did a simple how-to make her. I didn't do any molding with her because she had the perfect shape already.


Marianne is my all time favorite hat! I love her so much and you can probably see why.


And last but not least is Marie. She's an earlier styled hat but I love her all the same. She's so bright and vibrant! I love wearing her in the fall.


Ok so there aren't any hats in this scene but it is my favorite scene from Sense and Sensibility. If you haven't seen the movie then check it out. (I made a reproduction of the dress Kate Winslet is wearing in this scene also)