My friend and co-worker Skyler is the genius behind Unicorn Mullet. She does these cute little resin jewelry and polymer clay beads.
And what's really got me excited for her is that one of her rings has been featured on the cover and in the magazine of Harpers Bazaar Indonesia!
I am super proud of Skyler and so happy for her! You can visit her etsy page and check out some of her amazing stuff yourself at http://www.etsy.com/shop/unicornmullet
Showing posts with label diy accessory. Show all posts
Wednesday, January 25, 2012
Wednesday, November 16, 2011
DIY Cinderella's Apron
Every little girl wants to be Cinderella.

Step one- gather your materials, you'll need a various fabrics, scissors, ribbon, fusible interfacing and a sewing machine.

Cut 4 pieces like this. I used a t-shirt as my guide and made sure to cut it smaller than the actual t-shirt because there will be a third piece that will go in between.

Cut 2 pieces like this;

Pin 1 of your center bodice pieces to one of your left bodice pieces and sew.

Repeat by sewing same center bodice to right bodice.

Cut 10 pieces of ribbon about 1 inch long.

Fold ribbon in half and sandwich between center bodice and left bodice, pin and sew;


Repeat on opposite side.

Pin right sides together of both bodice pieces and sew along sides and neckline.

Turn right side out and set aside for now.
(Optional: For the bottom of my apron I died the white fabric in tea giving an uneven dye so it appears dirty like Cinderella's apron would have been.)
Cut 4 long strips for the apron ties;
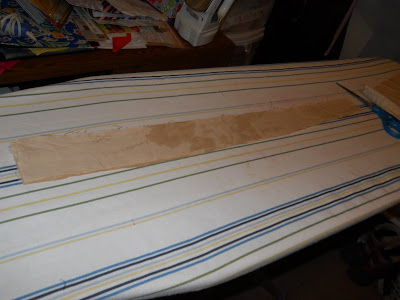
With right sides together sew two pieces of together along the long sides and turn right side out.
Cut out a trapezoid shape for the bottom of your apron and hem along the 3 long sides )make sure that the short side will match up to your bodice perfectly after hemming.
By this point your pieces should look something like this;

Sew your bodice to the skirt of your apron;

Pin and sew apron ties to sides of apron and close off open end by folding it in on itself and sewing down.

Next cut 4 strips of fabric in the same fabric of your bodice. With right sides together sew long sides to make 2 ties.

Fold raw edge of one side of each tie in on each other, pin and sew.

Attach at shoulder in your choice of method (I used my serger to finish most of my raw edges).
The next steps are optional, you can be done at this point if you like. I chose to make patches though.
To do this cut out fabric you'd like to use for your patches and cut out fusable interfacing in the same size and shape as your patches.

Fuse interfacing to fabric patches.

Attach your patches in the where you want them on your apron. You can use a satin stitch if you like but I used a straight stitch and went back over it using a criss-cross stitch in embroidery floss to make it more cartoonish.


Finished!


Step one- gather your materials, you'll need a various fabrics, scissors, ribbon, fusible interfacing and a sewing machine.
Cut 4 pieces like this. I used a t-shirt as my guide and made sure to cut it smaller than the actual t-shirt because there will be a third piece that will go in between.
Cut 2 pieces like this;
Pin 1 of your center bodice pieces to one of your left bodice pieces and sew.
Repeat by sewing same center bodice to right bodice.
Cut 10 pieces of ribbon about 1 inch long.
Fold ribbon in half and sandwich between center bodice and left bodice, pin and sew;
Repeat on opposite side.
Pin right sides together of both bodice pieces and sew along sides and neckline.
Turn right side out and set aside for now.
(Optional: For the bottom of my apron I died the white fabric in tea giving an uneven dye so it appears dirty like Cinderella's apron would have been.)
Cut 4 long strips for the apron ties;
With right sides together sew two pieces of together along the long sides and turn right side out.
Cut out a trapezoid shape for the bottom of your apron and hem along the 3 long sides )make sure that the short side will match up to your bodice perfectly after hemming.
By this point your pieces should look something like this;
Sew your bodice to the skirt of your apron;
Pin and sew apron ties to sides of apron and close off open end by folding it in on itself and sewing down.
Next cut 4 strips of fabric in the same fabric of your bodice. With right sides together sew long sides to make 2 ties.
Fold raw edge of one side of each tie in on each other, pin and sew.
Attach at shoulder in your choice of method (I used my serger to finish most of my raw edges).
The next steps are optional, you can be done at this point if you like. I chose to make patches though.
To do this cut out fabric you'd like to use for your patches and cut out fusable interfacing in the same size and shape as your patches.
Fuse interfacing to fabric patches.
Attach your patches in the where you want them on your apron. You can use a satin stitch if you like but I used a straight stitch and went back over it using a criss-cross stitch in embroidery floss to make it more cartoonish.
Finished!
Wednesday, August 17, 2011
Craft My Soul Giveaway
I am currently a couple posts away from my 100th post and my own giveaway so what better way to celebrate that than to give you guys some insider information on another giveaway going on right now?
If you don't already follow Craft My Soul I highly recommend her. I started following her when I noticed all the lovely wedding ideas she has on her blog as well as some really cute DIYs. She's pretty crafty and I for one want to try my hand at her Nautical Picture Frame idea. She is also a fan of Project Runway which in a way makes her a total kindred spirit!
She is currently doing a giveaway for her 50th follower and the rules of her giveaway are pretty simple; 1. Follow her via Google Friend Connect 2. Leave her a comment that includes your e-mail address that tells her what you like about her blog or would like to see in future. It's not asking much right?
In return if you should win you will get these awesome hair accessories made by herself if I am not much mistaken.
Good luck to you and keep an eye out over the next week for my own giveaway!
Labels:
craft blog.,
craft my soul,
diy accessory,
diy blog,
giveaway
Wednesday, August 10, 2011
My Heart's a Tart Facinator (tutorial)
Start by making your flowers- I made some circle roses out of different fabrics. To see how I made them check out my Be My Valentine Bustier tutorial.
Cut two equally-sized heart shapes out of your felt.
Cut a much larger heart shape out of your tulle.
Pick out the headband you want to use- I am using an elastic one because it works well for this project.
Plug in your glue gun and begin to heat it up.
Cut your organza into a strip of your desired length. Burn the edges and make a bow out of it.
Take one of your felt hearts and glue the tip of your tulle to the tip of your felt so that they join together at their points. Then place your bow on top.
Glue down your flowers where you want them placed on your facinator.
Turn your heart over and place glue all over the back side.
Place your headband carefully down on your hot glue.
Cover with your second heart and let dry. Once dry clean up any edges on your felt and you are done!
Saturday, July 16, 2011
Feather Headband Tutorial
Make your own pretty feather headband.

Today's Insipration is this--

Oh well, here we go- it's pretty easy, takes about 10 minutes and is so pretty you'll want to wear it as soon as possible.
What You'll Need-
1 colored ostrich feather.
1 like colored ribbon
1 hot glue gun
2 broaches or other decorative jewelry.
1 pair of scissors.
1 bottle of fray check or a lighter.

Start by heating up your hot glue gun.

Cut your ribbon long enough that you can tie it around your head and treat the end of your ribbon with either fray check or by burning it.

Next clip off the end of your feather.

Mark the center of your ribbon to use as a reference later.

Glue a bead of glue along the quill of your feather gluing about halfway down the length of your feather.

Press your ribbon down the first half of your ribbon and then glue down the second half. Be careful that none of your feathers get caught in the glue.

Next glue your choice of decorations on top of the feather.


To curl your feathers- grab a small secon of the feathers with your hand and using a pair of scissors run your scissors over the feathers like you would to curl a ribbon. For full details I will provide this video link;


Today's Insipration is this--

Oh well, here we go- it's pretty easy, takes about 10 minutes and is so pretty you'll want to wear it as soon as possible.
What You'll Need-
1 colored ostrich feather.
1 like colored ribbon
1 hot glue gun
2 broaches or other decorative jewelry.
1 pair of scissors.
1 bottle of fray check or a lighter.
Start by heating up your hot glue gun.
Cut your ribbon long enough that you can tie it around your head and treat the end of your ribbon with either fray check or by burning it.
Next clip off the end of your feather.
Mark the center of your ribbon to use as a reference later.
Glue a bead of glue along the quill of your feather gluing about halfway down the length of your feather.
Press your ribbon down the first half of your ribbon and then glue down the second half. Be careful that none of your feathers get caught in the glue.
Next glue your choice of decorations on top of the feather.
To curl your feathers- grab a small secon of the feathers with your hand and using a pair of scissors run your scissors over the feathers like you would to curl a ribbon. For full details I will provide this video link;
Labels:
diy accessory,
diy blog,
diy fashion,
diy headband,
feather
Subscribe to:
Posts (Atom)


