Showing posts with label diy dress. Show all posts

Monday, February 15, 2016

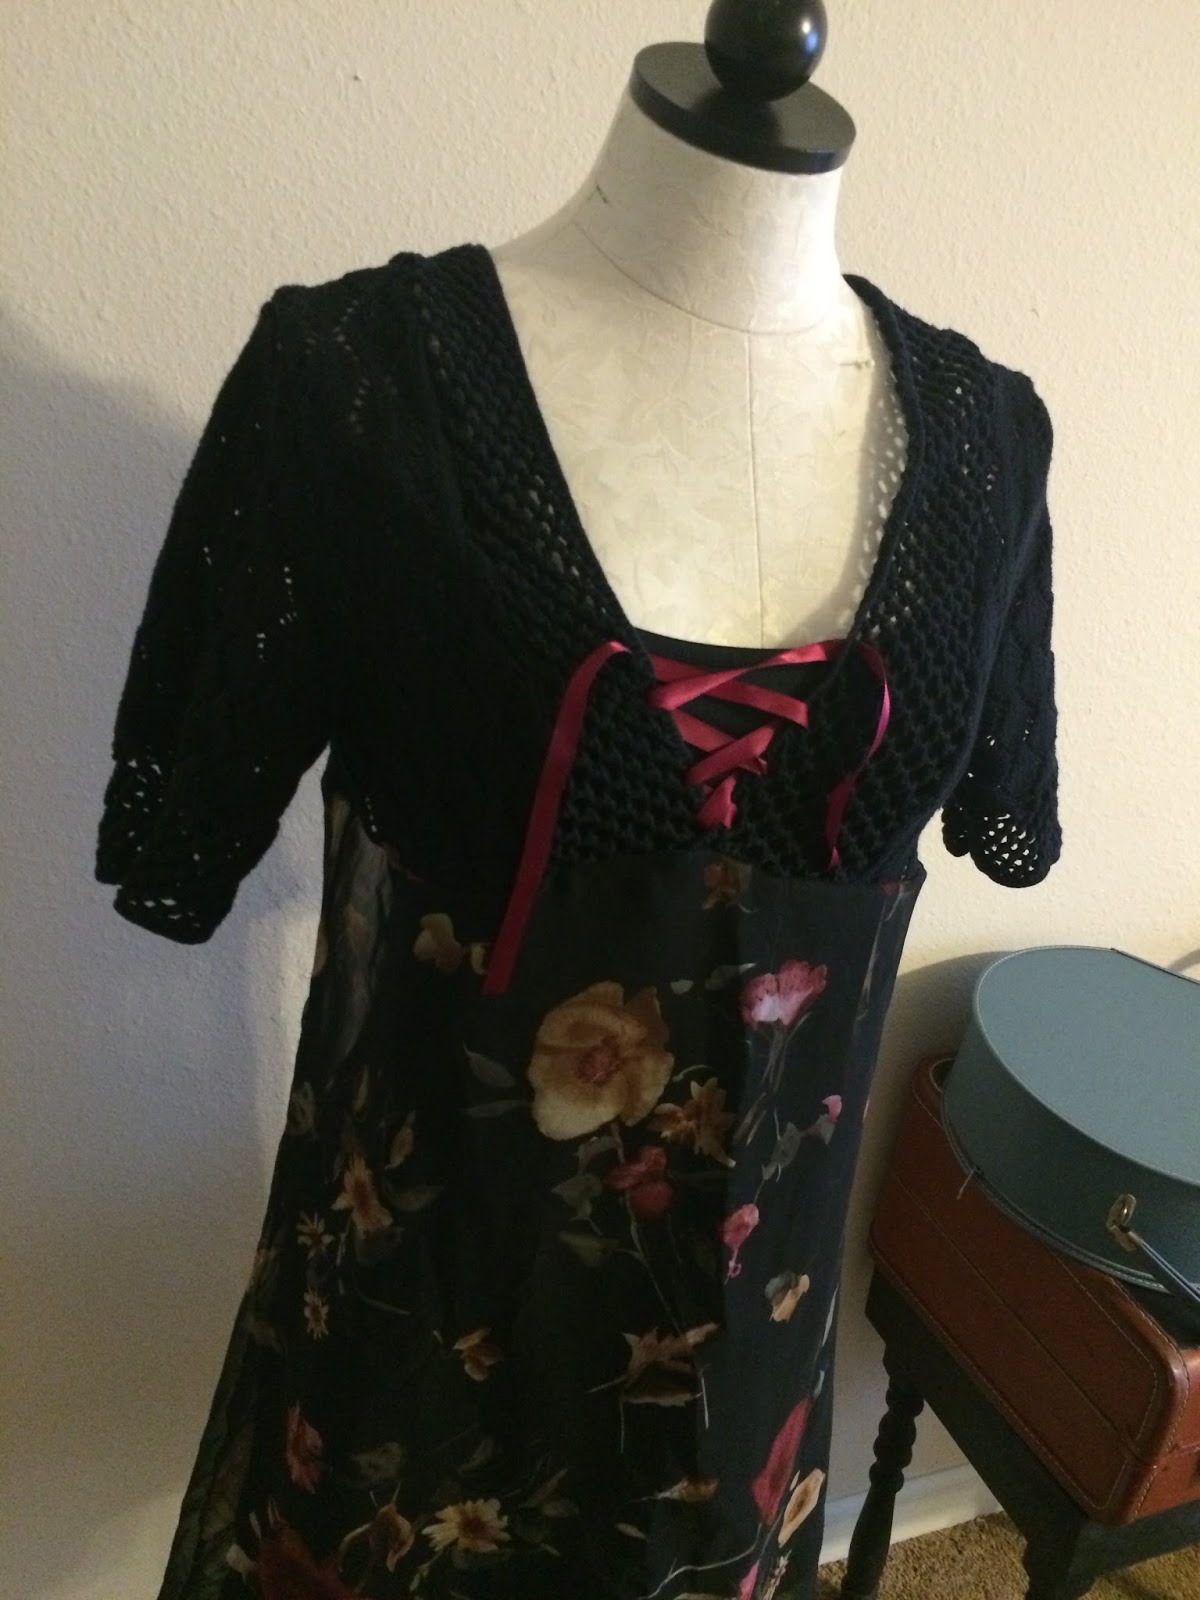
DIY Easy Shift Dress. Sweater Upcycle

I wonder how many women have a crotchet cardigan in their closet like I do?

 
I purchased one really fast one day when I needed a black sweater for work. Got to love retain dress codes. Seriously, why do retail stores like to make their works invisible by making them wear all black? I wore this sweater quite a bit for my old job and then this happened.


I'm not ashamed to admit that I still wore it even after which probably didn't help the hole much.
 
 
So I decided to save it. First I marked around the hole and under the bust with my tailors chalk.
 
 
And then I cut around it.  I failed to photograph the next steps, because after that I started to feel clueless on what I was doing-literally I didn't determine what I where I was going with this until about 20 minutes ago. I decided to go back and cut the original lattice crochet that went around the sweater and I searged it back on around the neckline. Of course if you don't have an overlock machine you could use a zig-zag stitch or an overlock stitch if you have a higher-end machine.
 
 
It looks like stitch G represented above. You may need a special foot for this stich- having never needed to use my machine for this I can't say for sure.
 
 
Next I rummaged through my bin of "To Be Upcycled" clothes and came out with this dress that I have literally had since the 90s. Yes, if the fabric is good I will hold on to something for 20 years.
 
 
I cut the top off and serged the skirt to the crotchet top.
 
Lastly I laced a matching ribbon through the lattice work for a corset look. Worn over my favorite black full slip and I've got a great dress that I suspect I'll be able to wear through the seasons.


Friday, April 5, 2013

DIY Dying Fabric: Bucket dying

Ok so I thought I'd take a break from sewing DIYs to something that anyone can do no matter what your DIY Skill level is. I'm going to be covering how to dye fabric by bucket, stove and machine. They are all fairly similiar in the steps but they all have different results and should be used for different types of dying.

The most common way to dye fabric is by bucket. This is my least favorite way to dye, I don't really recomend using this method. It's very messy and the results aren't always that great.

So then you want to know why I or anyone would use this method. You would use this method of dying if you needed to do a special effect like ombre or tye dying. Still, it's really messy and not always going to turn out right.

What you'll need-
a bucket or tub,
salt or vinegar depending on your fabric.
fabric dye- I recommend RIT dye.
Hot water
and whatever you want to dye.

 
I'm ombre dying a dress. Which I love but is pretty plain. I researched how others ombre dyed their fabric, and most tied off their garment with rubber bands. I wasn't sure about doing this but I went ahead and did it anyway. And because my fabric was cotton I chose to use salt as my staying agent.
 
Now I didn't take pictures of everything so bare with me. You'll want to start by filling your tub with hot water and disolve your salt in said water. I only did about 2 cups of water to 1 cup of salt.
I then added my dye. Mix your dye and salt until well disolved in your water.


Because I'm ombreing my dress I started with just 4 cups of hot water and submerged the bottom layer of my dress.
 
As I dipped my dress further into my tub, I added an additonal 2 cups of water.
 
 
After about 25 minutes you want to rinse out your fabric. You should start by rinsing it in warm water and slowly work towards cold water. Then wash your garment seperatly in cold water.
 
When I finished with this method my dress appeared more tie dyed than ombre.
 
 
Not the look I was going for.


Wednesday, August 15, 2012

Pleated Dress

So in my desperate need for maternity clothes that I could afford (ahem free), I hit up a church clothing drive and found this hidious dress among the stock piles.


I knew I could do something with this frumpy 80s dress so I took it.

First I seperated the shoulder pads from the top and then removed the skirt from the blouse.

The skirt was pleated which was spectacular.


It reminded me of this DIY dress I found on Pinterest.


(click on the picture to view her tutorial).

I made a few minor adjustments to compensate for my belly and rather than using fray check I plan to do a rolled hem on my sleeves. I have worn this dress once and got a lot of compliments on it so needless to say, it will get worn again.


Sorry, no pictures showing off my baby bump- it's a bit too much work for me to pull out my tripod for a picture shoot right now. But I love the dress anyway and I know I'll still get wear out of it once I've had my baby.


Wednesday, August 17, 2011

Shirred Print Dress


I made this dress ages ago but haven't gotten around to posting the tutorial for it yet (I'm always thinking I'll do more with a tutorial than I actually do). This is a super simple dress to make- anyone beginning sewer should find it a cinch (pun intended). All you need to be able to do is sew in a straight line.

So anyway what you'll need is some fabric with a great print, elastic thread, regular thread, a sewing machine, measuring tape, iron, tailors chalk, a straight edge and a pair of scissors.


You'll want to begin by measuring around the widest part of your body and doubling that measurment. That's how wide you'll want to cut your fabric. I cut my fabric in two so I had two side seams but if you just cut one seam and have that go down your back that might even be better (there are days when I can't figure out which way is the front of my dress) and that will at least give you an idea of the front vs. the back.


Next sew your side seam or back seam together.


Next hem the top and the bottom of your dress.


Your dress thus far should look something like this.


Get out your elastic thread and thread your bobbin case with it. Using a wider stitch length thread your machine with regular thread on your needle and the elastic thread in the bobbin. Begin to sew along the top part of your dress. This will gather your dress in the elastic and create shirring. Do several rows of the shirring (I did 5) along the top.


The top of your dress should now look like this;


Put your dress on and determine where you would like your waist to be defined at (generally the smallest part of your body). Mark that with your tailors chalk and remove your dress. With your straight edge draw a straight line across the front and back of your dress at that point and begin shirring along that line. Shirr about 10 rows with your elastic thread.


Next make your straps for your dress. You can do a lot with straps to change up the look of your dress. Originally I made wide straps with the following steps;

Begin by deciding how wide you want your straps to be and how long they need to be. Measure the length and double with width. Cut out your straps from those measurments being sure to leave a little extra seam allowance.


Fold your straps in half width wise so that your right sides are facing together and sew.


Turn your straps inside out and press flat with the seam in the center back.


Attach your straps where you like them on your dress.


I later went back and adjusted my straps (I didn't get pictures of this). I simply cut my original straps in half width wise so I had 4 straps instead of two. I then folded them in towards each other like bias tape and sewed them down straight. I tied knots on the ends and sewed them on so that they tied together at the center.


Wednesday, August 10, 2011

DIY Slit Back Dress (With small tutorial)


I started out with this funeral looking wool black dress from the 1980s.


I had to begin by altering the dress to better fit me. It sat a little too low in the sleeves so I removed them and raised them up slightly.


Then I removed the zipper from the back of the dress. The dress was fully lined which made things really easy for me. All I had to do was pin the lining back to the dress and sew.


I then added a hook and eye at the top of the dress to fasten the dress together.


I then re-attached the sleeves and determined how short I wanted them. I wanted quarter length sleeves.


I cut and hemmed the sleeves to my desired length.


Lastly I shortened the skirt and re-hemmed both the lining and the dress.